Monthly musings: May
Hanging baskets to die for
Hanging baskets can be superb or simply so-so, and the secret of creating a real stunner lies in knowing the right tips and wrinkles.
First assemble your plants. When your goal is high-power flowering all summer, you still can’t beat traditional bedding plants. For a showy mixed basket you’ll need a few trailing types (lobelia, ivy-leaved pelargoniums, verbena) to hang down over the sides, some short bushy types (fuchsia, zonal pelargonium) to fill the middle, and perhaps a modest annual climber (morning glory, black-eyed Susan) to twine up the chains.
Alternatively some people prefer to plant an entire basket with the same type of plant to create a huge ball of bloom; petunias are brilliant used this way. Either way, as a rough guestimate, you’ll need as many plants as the width of your basket in inches.
Next choose your basket; there are several sorts. The traditional wire sort is little more than a framework, so it needs a liner to stop the compost falling out through the gaps. You can buy one, or cut an old sweater or bit of black plastic to fit (turn an old compost bag inside out, so the black inside faces outside).
Rustic horn-shaped hanging baskets made of twigs are fashionable but rather short-lived as they rot or turn brittle and break after a few years; slip a suitable-sized plastic bag inside, as a liner, and snip a small a drainage hole in the bottom. Modern hanging baskets look rather like a plastic mixing bowl suspended on chains, but they’re the easiest to use as they don’t need lining.
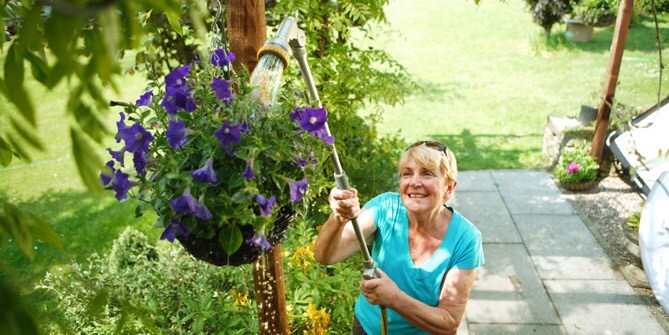
All types of hanging basket need a support system - these range from traditional scrolled brackets to ultra-modern tubular stainless-steel designs. Just make sure the one you choose is big enough and strong enough for the basket you are trying to suspend. You can make watering and preening a lot easier by adding a special pulley device that allows you to raise and lower the basket without taking it out of its bracket.
Now for compost. Any good multipurpose compost is fine, but since hanging baskets are notorious for drying out fast it’s worth mixing in some water-retaining gel crystals. Follow the directions; mix the crystals with water before you mix them into the compost. If you ‘take a short cut’ and mix them in dry, they swell up when you water your finished basket – and push the plants out, like a baby cuckoo heaving out the eggs of its host.
Another additive that’s well worthwhile is a dose of slow-release feed granules. Mix these in with the compost before you fill the basket. They act as a reservoir of nutrients that’s automatically released ‘little and often’ right through the growing season, and beef up your regular liquid feeding. It’s a little tip I’ve picked up from people who win prizes for their hanging baskets, and it’s well worth doing.
With the additives mixed well into the compost, fill your container to within two and a half inches of the rim, then arrange your plants attractively. Water them well before tipping them out of their pots and tucking them in place. Pack in as many as you can, so the rootballs are touching, then fill any gaps with compost and water well again. Use the same technique for a traditional wire basket (balancing it on a large pot or bucket to keep it stable) but here you can plant into the sides as well as the top, which makes a far more impressive display. Simply stab a small cross in the liner where you want each plant to go and push the roots through – ‘plugs’ are easiest to use as they have small, firm rootballs.
If you plant properly and keep well up to date with watering, liquid feeding and deadheading, you’ll have hanging baskets to die for: the envy of visitors, neighbours and passers-by from now until autumn. The secret lies in never letting your baskets go short of food and water – it’s as simple as that.
Happy gardening!