Why choose potatoes
Close your eyes and imagine biting into that first steaming, new potato of the season, dabbed with a knob of creamy butter and decorated with a sprig of freshly picked, home-grown mint – absolutely delicious! If you fancy growing your own, now is an ideal time to start. ‘Ah!’ I hear you say…’don’t you need a big garden to grow potatoes…and aren’t they a lot of effort?’ The truth is, you don’t need a garden at all, since you can get a couple of meal’s worth of new potatoes from a potato planter bag (or you could use an old bucket), and a lot more from a dustbin-sized container. As for effort, provided you follow a few basic rules, potatoes are easy-peasy – just plop a tuber in the ground and let it grow.
Try these

Rules of engagement when growing new potatoes
Buy quality seed potatoes My first golden rule is to start with bona fide seed potatoes guaranteed to be virus free. Don’t be tempted to make do with unused tubers lurking under the kitchen sink, since these will not be in the best condition and are much more likely to suffer from debilitating virus disease. You can buy seed potatoes as named individual varieties, or in packs, like the Baby new potato collection, that contains six different varieties that offer a range of flavours and textures.
Hit the ground running Start the seed potato tubers into growth before planting. This is known as ‘chitting’ – or is that ‘cheating’ as one old gardening friend liked to say? Not a bad description since this cunning technique can save up to six weeks in growing time. It’s simple too, since all you need to do is to place the seed potatoes, eyes uppermost, in a seedtray or empty egg box and leave them in a well-lit, cool, but frost free place (such as a porch or spare-room windowsill) for a couple of weeks during early February. Once fat, stumpy shoots appear, rub out the weakest to leave two or three on each tuber.
Plant at the right time Don’t be ruled by the calendar – the best planting date will depend on where you live and the conditions in your garden. For example, you can plant chitted tubers from mid-February in mild southern areas where the soil is light and workable, but would be better off waiting for a month or so in colder parts or if your garden is in a frost pocket. Plant tubers about 15cm deep, spaced 40cm along the row, with 45cm between rows. Traditional advice dictates that you have to create trenches to plant tubers, but they’ll do equally well planted in individual holes – saving a lot of effort.
Protect shoots and tubers Although tubers are safe buried 15cm below ground, when new shoots emerge above soil they are vulnerable to late frosts. You can prevent damage the old-fashioned way by drawing up soil from either side of the row to create a protective ridge over the potato foliage. This also prevents tubers near the surface being exposed to light and turning green – making them inedible. Alternatively you could cover the soil with a mulch of well-rotted manure and top up with grass clippings (but not from a lawn treated with hormone weedkiller). Emerging foliage also can be protected with double-thick garden fleece until the threat of frost has passed.
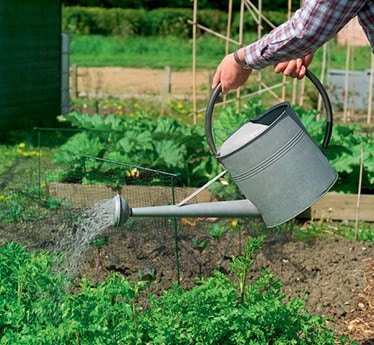
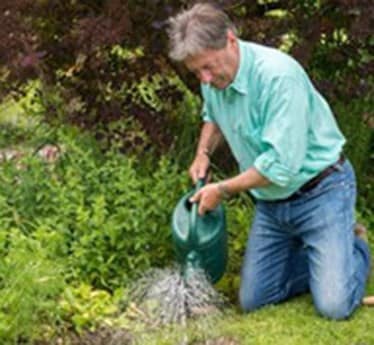
Water well Watering increases yields, so it is essential to keep the soil moist when the tubers are swelling – watering the ground thoroughly, once a week, during dry spells. If your soil is very free draining, or may struggle to keep up with the watering, choose a drought-resistant variety, such as ‘Rocket’.
Harvest regularly As soon as the tubers reach the size of hen’s eggs, harvesting can start. If you are lucky, you could have fresh new potatoes by the end of May. For the first harvest, use a small hand fork to excavate around the plants and then push your hands among the roots to ‘dip’ for tubers. The plants can then be left for a second crop later on. Double harvests Once the first crop has been harvested, you can plant any left-over seed potatoes in the same ground. Start them into growth by the end of April, plant them in June and you’ll get a second bonus crop of early potatoes by the autumn. Watering is the key to success here, especially if we have a dry summer.
Spuds in tubs If you don’t have a veg patch and still want to grow new potatoes, you can grow them in tubs or even a used compost sack. Choose the largest pot you can find and make sure there are drainage holes in the bottom, before half-filling the container with soil that’s been augmented with well-rotted garden compost. Add in a sprinkling of fertiliser, such as blood, bone and fishmeal, and cover two or three well-spaced tubers with 10cm of soil-mix. Top-up with soil-mix in layers every time new shoots appear until the container is full. Keep well watered throughout, to ensure a good crop. Once harvested, start the process again to get a second, bonus crop. Then, if you have a frost-free conservatory or greenhouse, move the pot undercover after harvesting the second crop to plant up again during early autumn for a third crop in time for Christmas.