How to plant a climber
Climbers are wonderfully versatile plants. Of course you can use them to cover walls or fences anywhere in the garden and they are ideal for decorating arches and pergolas and other garden structures, but they’ll also provide unusual but practical solutions to awkward planting areas, such as steep banks. Climbers are beautifully varied too; ranging from vigorous cover-alls that will smother the side of a three-storey building, to dainty fairy plants that will add a little sparkle to tubs and containers on the patio. For this reason, it is important to choose carefully and match the climber to the situation you have in mind. Fortunately, there is such a huge range of climbers available that there’s bound to be something to suit.
Choosing the right plant
Stand back for a moment and consider what the planting spot you have in mind has to offer.
- Which way does it face and will it get much sun?
- How big does it need to get to cover the growing space?
- How much time are you prepared to spend keeping it in good shape?
Knowing these key things you can buy your climber with confidence.

Successful planting
As a rule, climbers are as easy to plant as any other container specimen. However, the situation just makes it a little different. Planting next to a wall or fence means that the soil is likely to be a lot drier because the vertical surface blocks much of the rain. Any concrete footings will also draw out water from the soil by capillary action, making it even drier. In addition, if it is a new garden, the soil next to walls tends to be full of broken bricks and other rubble.
- Make sure the wall or fence is in good repair before fixing the support in place. If planting against a free-standing support, such as a pergola or arch, make the planting hole on the windward side so that climber is blown into the support during windy weather.
- Dig over the planting site thoroughly, removing any weeds and debris.
- Fork in lashings of well-rotted organic matter to enrich the soil and improve its ability to hold on to moisture.
- If possible, dig the planting hole slightly away from the support so the climber can send out roots on all sides. Make the hole a little wider than the container and just as deep. The exception to this rule is when planting clematis which are best planted a little deeper to help protect it against the dreaded clematis wilt disease (see How to plant clematis).
- Fork over the bottom of the hole and add more well-rotted organic matter.
- Water the climber thoroughly in its container before removing it. If there are roots circling the pot, tease them out with our fingers to encourage them to spread once planted.
- Place the rootball in the hole, adjusting the depth if necessary, and angle it slightly, so that the top of the climber reaches its support.
- Mix more well-rotted manure into the soil before filling around the rootball and pressing firmly.
- Then give it a good drink – a whole watering can full to soak the soil right around the rootball.
- Cover the surface of the soil with a thick mulch, taking care not to pile it up against the stems of the climber.
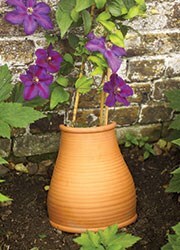
- If planted in a sunny spot, cover the mulched soil with pieces of tile or paving stones to help reflect some of the sun’s energy and prevent moisture loss from the soil – this is particularly important with clematis.
- Untie the long shoots from the supporting cane supplied with the climber and carefully tie them into the bottom of the support using soft string.
Planting next to established plants

Climbers can also look fantastic clambering though large shrubs and trees as well as over hedges - much in the same way as they do in the wild. To get a new climber to establish well in this situation you need to give it a bit of help and a leg-up. Dig a large planting hole at the edge of the canopy of the host plant so it can take advantage of the water that drips off when it rains. Prune off any roots hanging into the planting hole and line the sides of the hole with pieces of untreated timber to keep the host’s roots from invading. The wood will slowly rot away by which time the climber should be well established. Hammer in a short, stout post into the soil alongside the climber to act as an anchor. Then tie a rope or chain from the post to the lowest limb of the host plant to act as the ladder. This arrangement will also prevent the climber being pulled out of the ground in windy weather. Plant the climber as before, then tie in the shoots of the climber to the ladder and into the canopy. Water well and mulch generously.
